Enable Google Cloud Platform Managed User Auth
In this post, we’ll walk through the process of enabling and configuring Google Cloud Platform’s (GCP) Identity Provider for R projects. Authentication and user management are critical for building secure and scalable applications. While it’s possible to implement your own authentication methods, doing so can introduce vulnerabilities, increase development time, and require ongoing maintenance to address security risks and compliance.
GCP’s Identity Provider simplifies authentication workflows, offering a robust, managed solution that handles the heavy lifting for you. Whether you’re deploying Shiny apps, APIs, or R scripts on GCP, integrating a managed authentication service ensures ease of use, enhanced security, and scalability.
This guide provides a step-by-step approach to help you get started, leveraging GCP’s free-tier features wherever possible.
Let’s dive in and set up secure user authentication for your R projects!
Email / Password Identity Provider
The email/password provider is the simplest authentication method to configure, making it an excellent starting point. In this post, we’ll focus on enabling this method to get you started quickly and effectively. In future posts, we’ll explore how to work with other authentication providers to expand your app’s capabilities. Here’s how to enable the email/password identity provider:
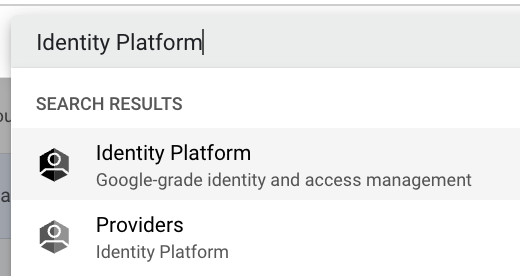
- Log in to the Google Cloud console, and search for “Identity Platform” using the search bar. Click on the “Identity Platform” service.
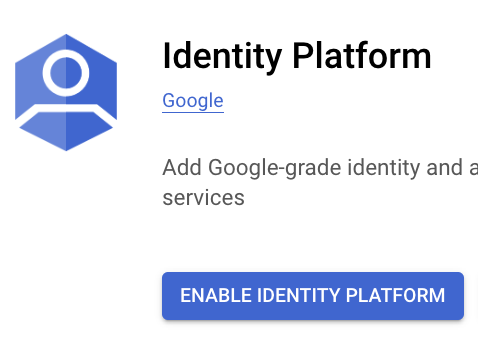
- Click the “ENABLE IDENTITY PLATFORM” button to activate the service.
- To add an identity provider, click “ADD A PROVIDER”.

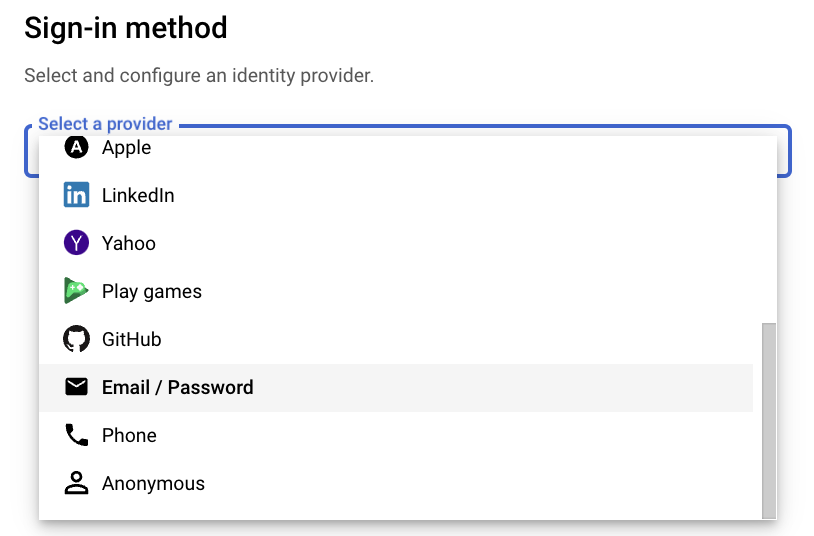
- From the dropdown menu, select and click “Email / Password”.
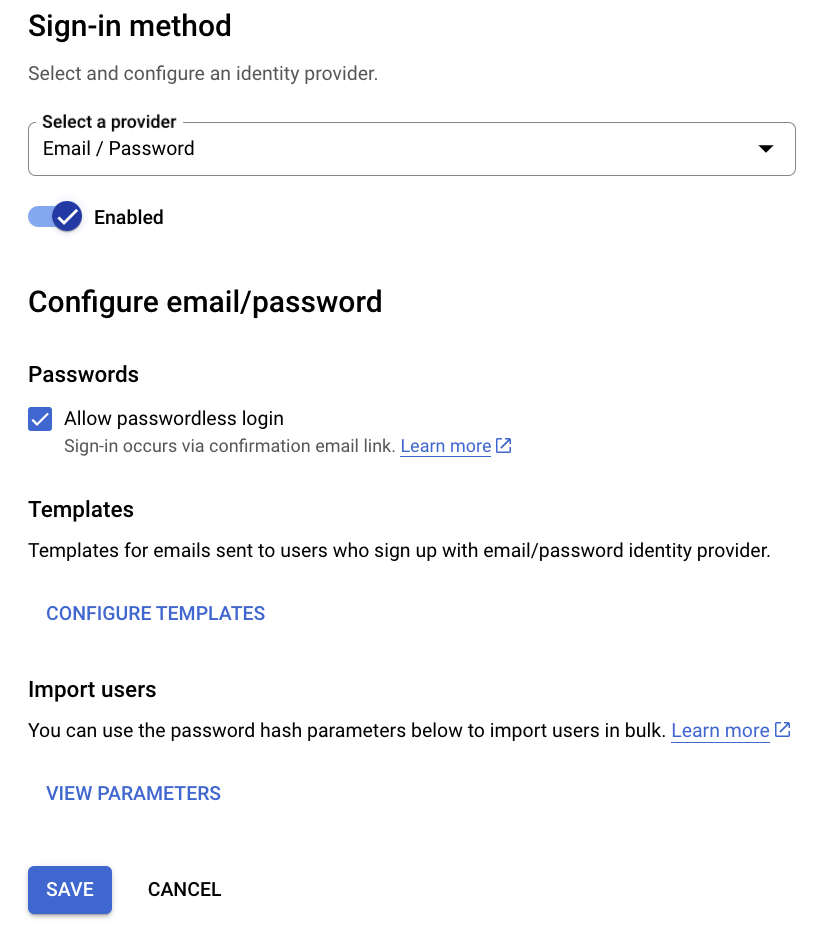
- Configure the email provider settings. The default options should work perfectly for most use cases. Once configured, click “SAVE”.
- After saving, click “APPLICATION SETUP DETAILS” to access the service’s API key.

- Copy the “apiKey” and store it securely. This key will be used in your applications to authenticate with the Identity Platform.
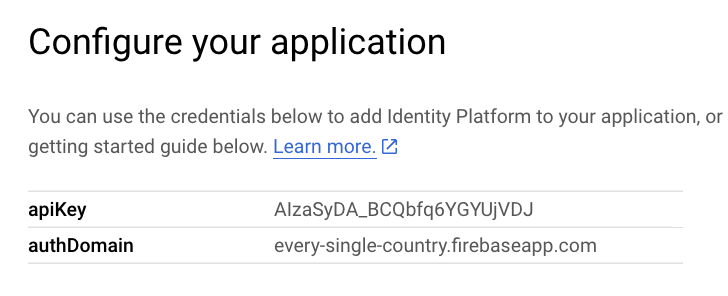
- That’s it! Your GCP Identity Platform is now set up with the Email/Password authentication provider, ready for use in your R projects.

Usage Example
Now that the Identity Platform is set up, you can integrate authentication into your R projects using the API key, also referred as “FIREBASE_API_KEY”. First, set your Firebase API key as an environment variable.
Sys.setenv(FIREBASE_API_KEY = "your-apiKey-here")With the API key in place, you have multiple options for integrating authentication into your R projects. You can either use the custom functions provided below, which directly interact with the Firebase Auth REST API, or opt for the firebase R package for a more streamlined approach.
The following custom functions demonstrate how to handle common authentication tasks such as signing in, signing up, resetting passwords, verifying emails, and fetching user data. These functions make secure API calls to the Firebase Auth REST API to interact with your GCP Identity Platform:
box::use(
  httr[content, POST]
)

if (nchar(Sys.getenv("FIREBASE_API_KEY")) == 0) {
  stop("Set `FIREBASE_API_KEY` env var to handle user auths.")
}

api_url <- "https://identitytoolkit.googleapis.com/v1/accounts"

#' Sign in with email / password
#' @param email The email the user is signing in with.
#' @param password The password for the account.
#' @export
email_signin <- function(email, password) {
  post_res <- POST(
    paste0(api_url, ":signInWithPassword?key=", Sys.getenv("FIREBASE_API_KEY")),
    body = list(email = email, password = password),
    encode = "json"
  )
  post_content <- content(post_res)
  post_content$success <- post_res$status_code %in% 200:299
  return(post_content)
}

#' Sign up with email / password
#' @param email The email for the user to create.
#' @param password The password for the user to create.
#' @export
email_signup <- function(email, password) {
  post_res <- POST(
    paste0(api_url, ":signUp?key=", Sys.getenv("FIREBASE_API_KEY")),
    body = list(email = email, password = password),
    encode = "json"
  )
  post_content <- content(post_res)
  post_content$success <- post_res$status_code %in% 200:299
  return(post_content)
}

#' Send password reset email
#' @param email User's email address.
#' @export
reset_password <- function(email) {
  post_res <- POST(
    paste0(api_url, ":sendOobCode?key=", Sys.getenv("FIREBASE_API_KEY")),
    body = list(email = email, requestType = "PASSWORD_RESET"),
    encode = "json"
  )
  post_content <- content(post_res)
  post_content$success <- post_res$status_code %in% 200:299
  return(post_content)
}

#' Send email verification
#' @param id_token The Firebase ID token of the user to verify.
#' @export
email_verification <- function(id_token) {
  post_res <- POST(
    paste0(api_url, ":sendOobCode?key=", Sys.getenv("FIREBASE_API_KEY")),
    body = list(idToken = id_token, requestType = "VERIFY_EMAIL"),
    encode = "json"
  )
  post_content <- content(post_res)
  post_content$success <- post_res$status_code %in% 200:299
  return(post_content)
}

#' Get user data
#' @param id_token The Firebase ID token of the account.
#' @export
get_user_data <- function(id_token) {
  post_res <- POST(
    paste0(api_url, ":lookup?key=", Sys.getenv("FIREBASE_API_KEY")),
    body = list(idToken = id_token),
    encode = "json"
  )
  post_content <- content(post_res, as = "parsed", simplifyVector = TRUE)
  post_content$success <- post_res$status_code %in% 200:299
  return(post_content)
}
These functions make it easy to manage user authentication directly within your R projects, enabling secure sign-ins, sign-ups, password resets, email verification, and more.
For a full integration, you can test this functionality within a simple Shiny app:
# App imports.
box::use(
  shiny[
    actionButton, br, conditionalPanel, div, fluidPage, modalButton, modalDialog, observeEvent,
    outputOptions, passwordInput, reactive, reactiveVal, removeModal, renderText, req, shinyApp,
    showModal, showNotification, textInput, verbatimTextOutput
  ],
  shinyvalidate[InputValidator, sv_email]
)

# UI definition for the app.
ui <- fluidPage(
  div(
    align = "center",
    br(),
    # If it's logged in show "Logout", in the other case show "Login".
    conditionalPanel("!output.logged_in", actionButton("login", "Login / Signup")),
    conditionalPanel(
      "output.logged_in",
      # Displays a message with the logged-in user's email when logged in.
      verbatimTextOutput("logged_msg"),
      actionButton("logout", "Logout")
    )
  )
)

server <- function(input, output, session) {
  # Reactive value to store authentication status (whether user is logged in or not).
  r_user_auth <- reactiveVal(list(signed_in = FALSE))
  # Reactive output to control the visibility of login/logout button based on auth status.
  output$logged_in <- reactive(r_user_auth()$signed_in)
  outputOptions(output, "logged_in", suspendWhenHidden = FALSE)

  # Modal dialog for login/signup.
  auth_modal <- modalDialog(
    title = "Login to Your Account",
    div(
      align = "center",
      # Inputs for email and password.
      textInput("user_email", label = NULL, placeholder = "Email", width = "100%"),
      passwordInput("user_password", label = NULL, placeholder = "Password", width = "100%"),
      # Buttons for submitting login or signup request.
      actionButton("login_submit", "Login"),
      actionButton("signup_submit", "Signup"),
      modalButton("Cancel")
    ),
    footer = NULL,
    easyClose = TRUE
  )
  # Input validation setup using shinyvalidate.
  iv <- InputValidator$new()
  iv$add_rule("user_email", sv_email())
  # Custom password length validation.
  sv_min_nchar <- function(value) {
    if (nchar(value) < 8) {
      "The password must have at least 8 characters lenght"
    }
  }
  iv$add_rule("user_password", sv_min_nchar)

  # Server functions.
  # Show the login modal when 'Login' is clicked.
  observeEvent(input$login, showModal(auth_modal))
  observeEvent(input$login_submit, {
    iv$enable() # Enable input validation.
    if (!iv$is_valid()) {
      return() # If validation fails, exit early.
    }
    # If validation passes, attempt to log in.
    user_email <- trimws(input$user_email)
    user_pass <- input$user_password
    login_res <- email_signin(user_email, user_pass)
    if (!login_res$success) {
      showNotification("Couldn't log in, please check your email and password!", type = "error")
    } else {
      # On successful login, update user state and close modal.
      user_data <- get_user_data(login_res$idToken) # Fetch user data.
      user_data$signed_in <- TRUE
      r_user_auth(user_data)
      removeModal()
    }
  })
  observeEvent(input$signup_submit, {
    iv$enable() # Enable input validation.
    if (!iv$is_valid()) {
      return() # If validation fails, exit early.
    }
    # If validation passes, attempt to log in.
    user_email <- trimws(input$user_email)
    user_pass <- input$user_password
    signup_res <- email_signup(user_email, user_pass)
    if (!signup_res$success) {
      showNotification("Couldn't sign up, please check your email and password!", type = "error")
    } else {
      showNotification("Signed up, succesfully! Please login now.")
    }
  })
  observeEvent(input$logout, {
    showNotification("Logged out, succesfully!") # Notify user of successful logout.
    r_user_auth(list(signed_in = FALSE)) # Reset auth status to logged out.
  })

  # Display logged-in user's email.
  output$logged_msg <- renderText({
    req(r_user_auth()$signed_in) # Ensure the user is signed in.
    paste0("Hi ", r_user_auth()$users$email, "!") # Greet the user by email.
  })
}

shinyApp(ui, server)
This Shiny app integrates the authentication functions, allowing users to sign in, sign up, and log out, all while interacting with the GCP Identity Platform system. You can use this as a template to quickly build secure authentication workflows in your own applications.